Thursday, June 28, 2018

Ubuntu mount local network shared folder

Server end

  • Install Samba
    • sudo apt-get update
      sudo apt-get install samba
  • Set a password for your user in Samba
    • sudo smbpasswd -a <user_name>
      • Note: Samba uses a separate set of passwords than the standard Linux system accounts (stored in /etc/samba/smbpasswd), so you'll need to create a Samba password for yourself. This tutorial implies that you will use your own user and it does not cover situations involving other users passwords, groups, etc...
        Tip1: Use the password for your own user to facilitate.
        Tip2: Remember that your user must have permission to write and edit the folder you want to share.
        Eg.:
        sudo chown <user_name> /var/opt/blah/blahblah
        sudo chown :<user_name> /var/opt/blah/blahblah
        Tip3: If you're using another user than your own, it needs to exist in your system beforehand, you can create it without a shell access using the following command :
        sudo useradd USERNAME --shell /bin/false
        
        You can also hide the user on the login screen by adjusting lightdm's configuration, in /etc/lightdm/users.conf add the newly created user to the line :
        hidden-users=
  • Create a directory to be shared
    mkdir /home/<user_name>/<folder_name>
  • Make a safe backup copy of the original smb.conf file to your home folder, in case you make an error
    sudo cp /etc/samba/smb.conf ~
  • Edit the file "/etc/samba/smb.conf"
    sudo nano /etc/samba/smb.conf
    • Once "smb.conf" has loaded, add this to the very end of the file:
      
      [<folder_name>]
      path = /home/<user_name>/<folder_name>
      valid users = <user_name>
      read only = no
      Tip: There Should be in the spaces between the lines, and note que also there should be a single space both before and after each of the equal signs.
  • Restart the samba:
    sudo service smbd restart
  • Once Samba has restarted, use this command to check your smb.conf for any syntax errors
    testparmT

Client end

  •  access your network share
          sudo apt-get install smbclient
          # List all shares:
          smbclient -L //<HOST_IP_OR_NAME>/<folder_name> -U <user>
          # connect:
          smbclient //<HOST_IP_OR_NAME>/<folder_name> -U <user>
    To access your network share use your username (<user_name>) and password through the path "smb://<HOST_IP_OR_NAME>/<folder_name>/" (Linux users) or "\\<HOST_IP_OR_NAME>\<folder_name>\" (Windows users). Note that "<folder_name>" value is passed in "[<folder_name>]", in other words, the share name you entered in "/etc/samba/smb.conf".
    • Note: The default user group of samba is "WORKGROUP".
 2. mount 
sudo mount -o username=<> //172.29.32.184/sharename /media/Data/

for windows
sudo mount -t cifs -o username=<> //172.29.32.184/sharename /media/Data/
  • Note- If you receive the error: wrong fs type, bad option, bad superblock on... make sure you have cifs-utils installed, it may not be installed on your distro by default.
    sudo apt-get install cifs-utils

Sunday, June 24, 2018

BUG: tensorflow tf.scatter_nd will accumulate (or undermined) values when indices have duaplicates

Problem:
WARNING: The order in which updates are applied is nondeterministic, so the output will be nondeterministic if indicescontains duplicates.

Solution:
https://github.com/tensorflow/tensorflow/issues/8102

If you are in the unpooling business:
@teramototoya what I did as a hack: with https://www.tensorflow.org/api_docs/python/tf/unique_with_counts i counted the multiplication in the indices and i divided the tensor which was holding the values (aka tensor named 'updates' in the first comment) with this counter
so when add() comes it will undo what the division made
If not, so your problem is general, then you have to somehow flatten your indices, and then tf.unique, see this post:
https://stackoverflow.com/questions/44117430/how-to-use-tf-scatter-nd-without-accumulation


2. Solution
Use a count auxilliary tensor.

cntOnes = tf.ones_like(dmVis, tf.float32)
vals = tf.stack([dmVis, mlVis, cntOnes], axis=1)
scatter_shape = tf.constant([bs, h*upsample, w*upsample, 3])
dmc = tf.scatter_nd(locVis, vals, scatter_shape)
dm, ml, cnt = tf.unstack(dmc, axis=-1)
cnt = cnt + epsilon
dm = dm / cnt

Monday, June 4, 2018

Remote VSCode Setup

Remote VSCode Setup


So this is where the Remote VSCode comes in. Remote VSCode is a Visual Studio Code extension that is available in all platforms supported by VSCode (yes, including both Windows and macOS), that implements the Textmate’s ‘rmate’ feature. This extension allows you to edit your files from your virtual machine a lot easier.
To use the extension, do the following:
  1. Launch Visual Studio Code, or install it here if you don’t have it yet
  2. Go to the ‘Extensions’ page and search for ‘Remote VSCode’
I already had the extension installed here
3. Install the extension and re-launch Visual Studio Code
4. In your Linux Virtual Machine, execute the following command in your terminal to install rmate
$ sudo wget -O /usr/local/bin/rmate https://raw.github.com/aurora/rmate/master/rmate
$ sudo chmod a+x /usr/local/bin/rmate
5. Go back to your Visual Studio Code and open up the command palette (CTRL+P for Windows and CMD+P for Mac) then execute the >Remote: Start Server command.
6. Once the server is ready, open up a new terminal and connect to your Linux Virtual Machine using the following command:
$ ssh -R 52698:localhost:52698 VIRTUAL_MACHINE_IP_ADDRESS
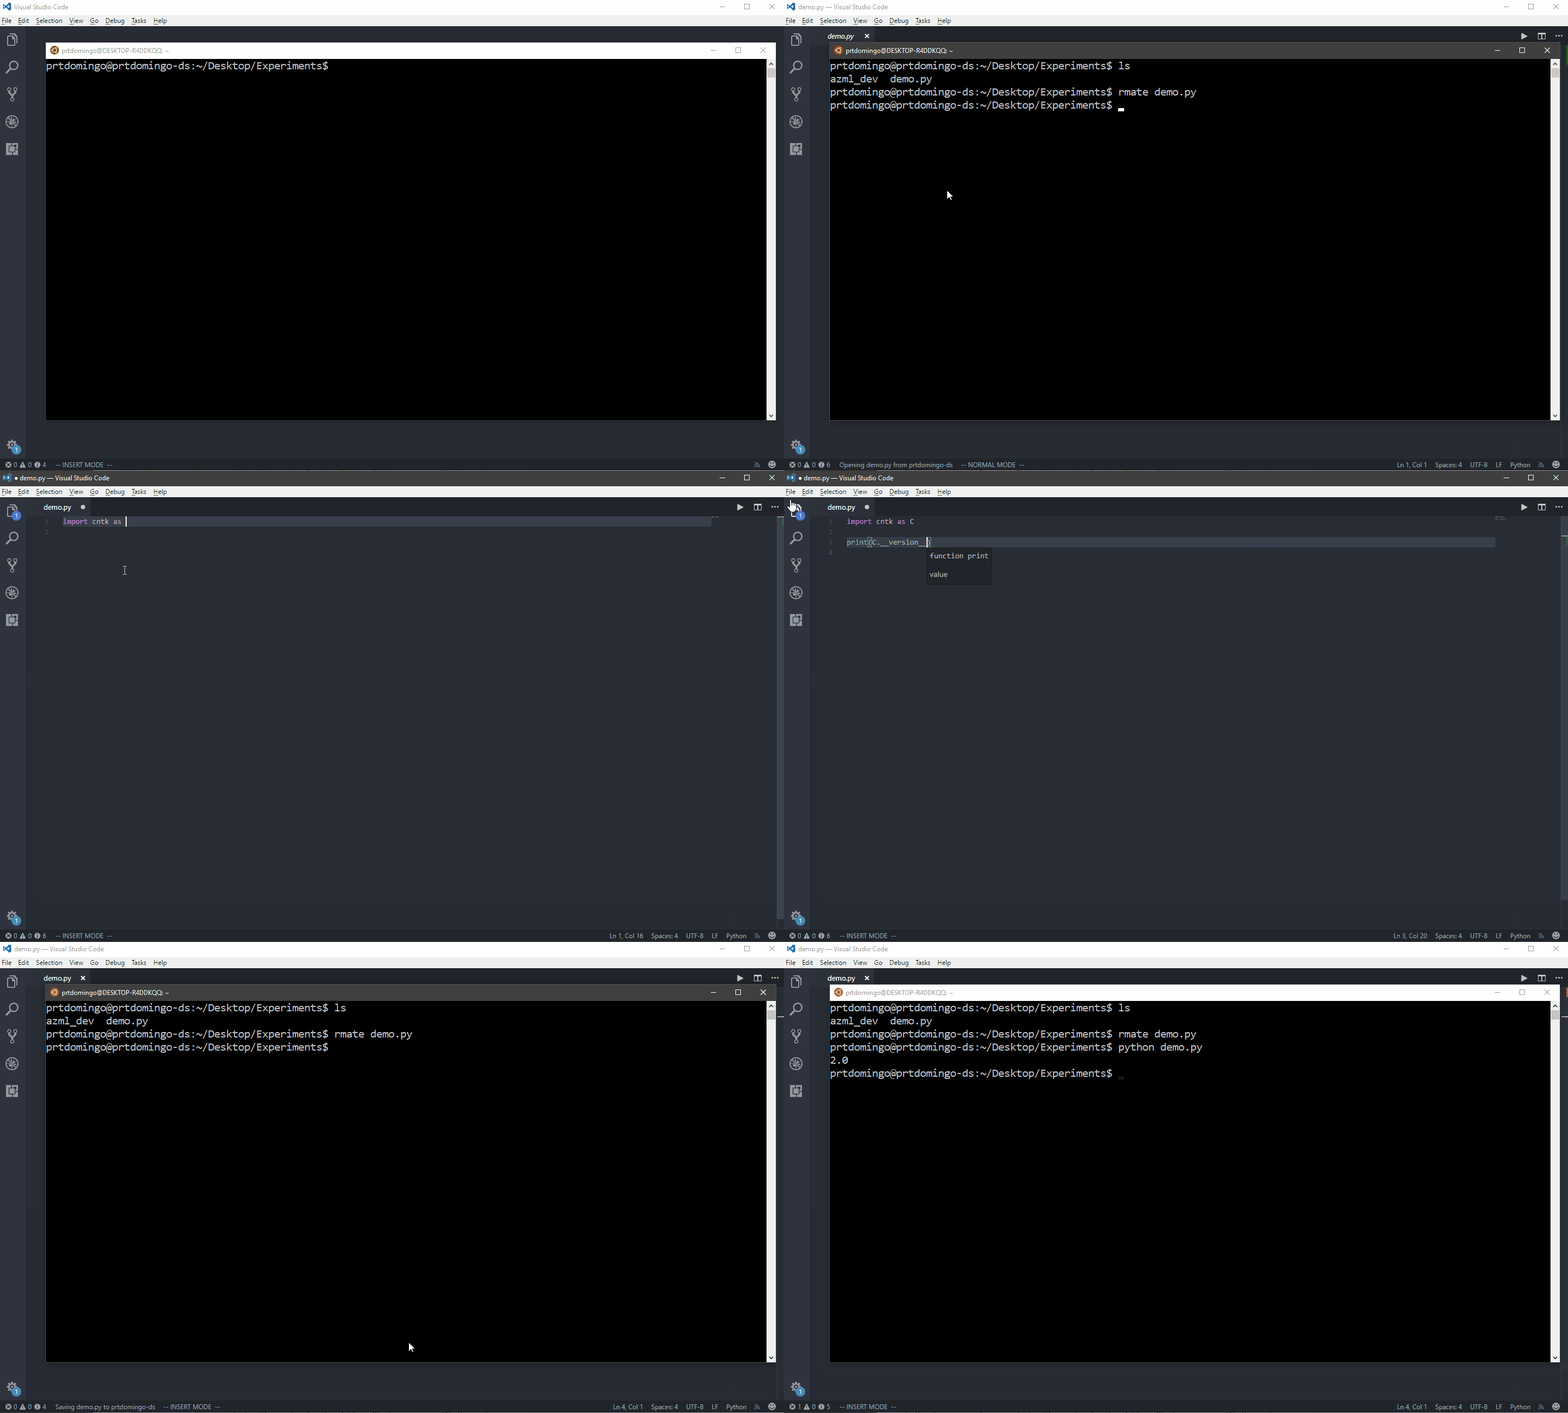
7. In your terminal, execute the rmate command with the file that you want to open up in your Visual Studio Code in your local machine
$ rmate demo.py
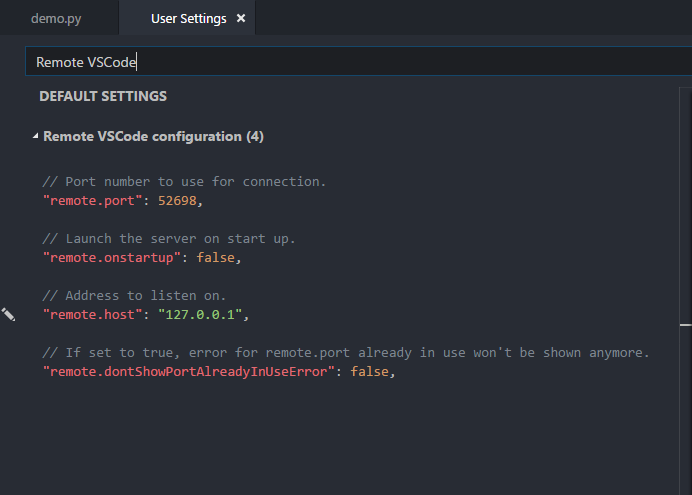
Just in case you’re also wondering where the 52698 port came from, it’s actually the default port that Remote VSCode is using. You can find and change that setting by simply going to your ‘User Preferences’ and search for ‘Remote VSCode configuration’.