Remote VSCode Setup
So this is where the Remote VSCode comes in. Remote VSCode is a Visual Studio Code extension that is available in all platforms supported by VSCode (yes, including both Windows and macOS), that implements the Textmate’s ‘rmate’ feature. This extension allows you to edit your files from your virtual machine a lot easier.
To use the extension, do the following:
- Launch Visual Studio Code, or install it here if you don’t have it yet
- Go to the ‘Extensions’ page and search for ‘Remote VSCode’
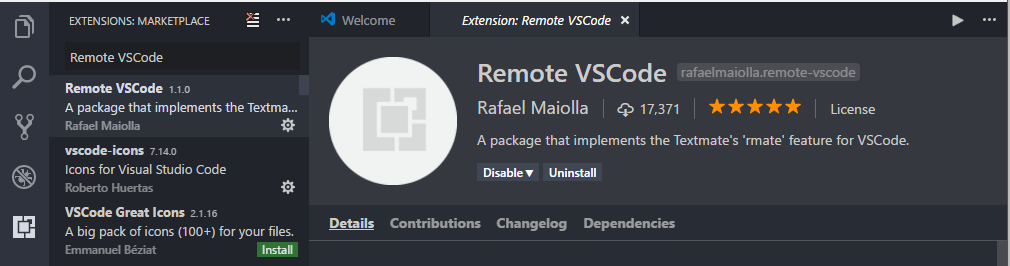
3. Install the extension and re-launch Visual Studio Code
4. In your Linux Virtual Machine, execute the following command in your terminal to install rmate
$ sudo wget -O /usr/local/bin/rmate https://raw.github.com/aurora/rmate/master/rmate
$ sudo chmod a+x /usr/local/bin/rmate
5. Go back to your Visual Studio Code and open up the command palette (CTRL+P for Windows and CMD+P for Mac) then execute the
>Remote: Start Server command.
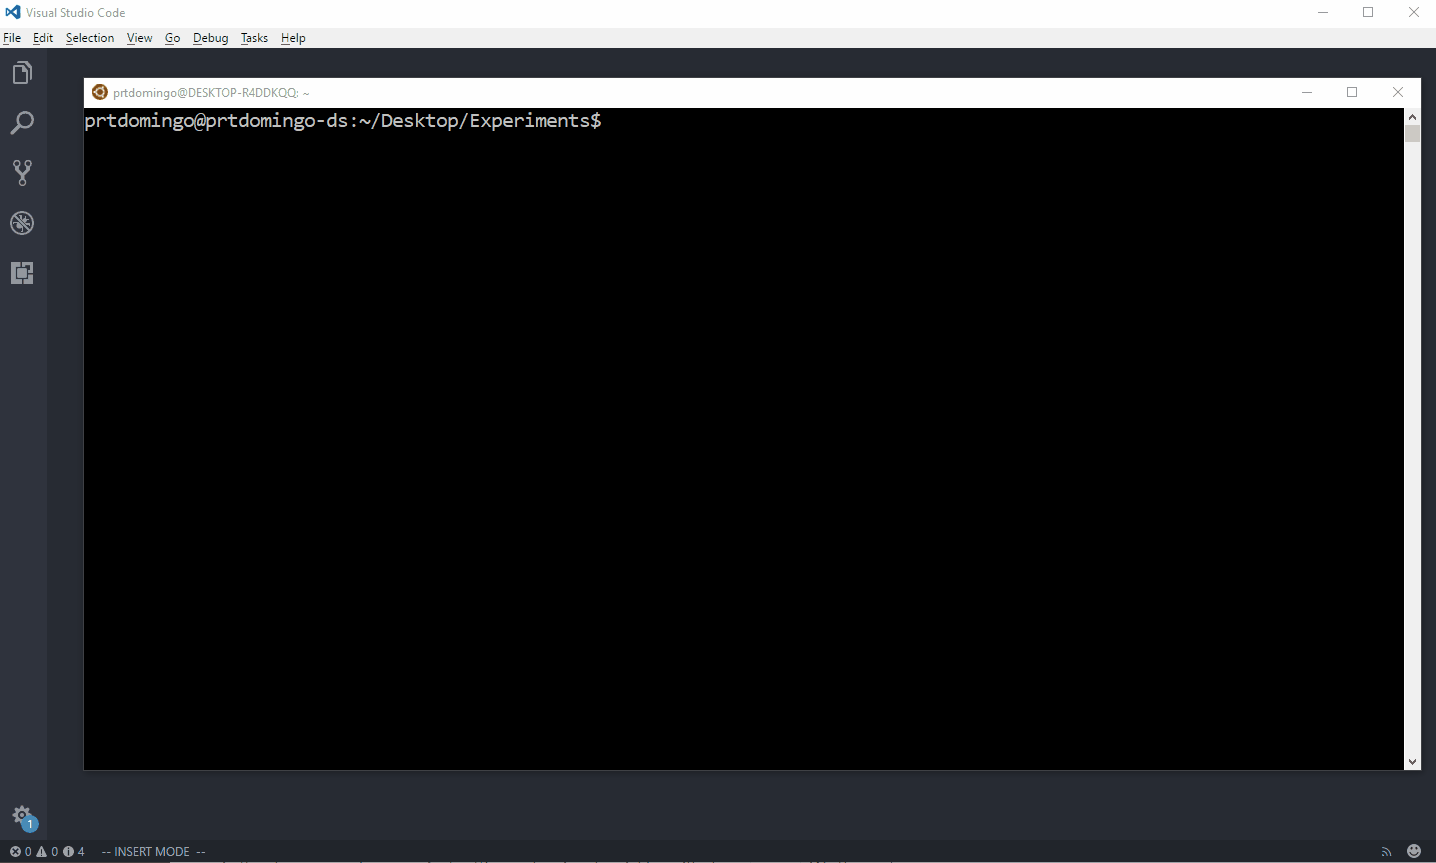
6. Once the server is ready, open up a new terminal and connect to your Linux Virtual Machine using the following command:
$ ssh -R 52698:localhost:52698 VIRTUAL_MACHINE_IP_ADDRESS
7. In your terminal, execute the
rmate command with the file that you want to open up in your Visual Studio Code in your local machine$ rmate demo.py
Just in case you’re also wondering where the
52698 port came from, it’s actually the default port that Remote VSCode is using. You can find and change that setting by simply going to your ‘User Preferences’ and search for ‘Remote VSCode configuration’.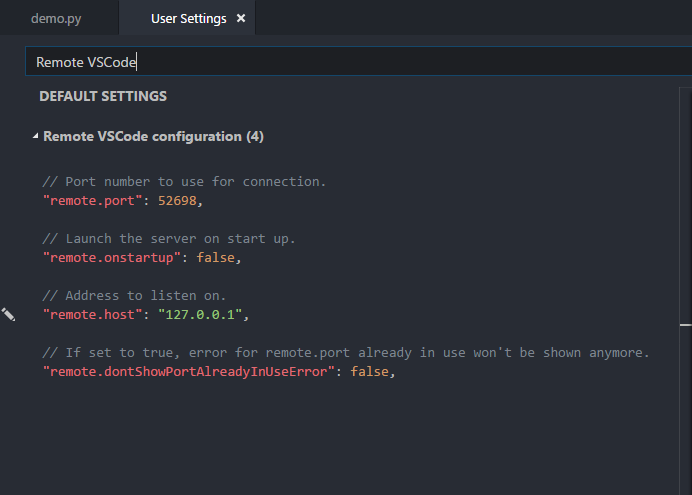
No comments:
Post a Comment